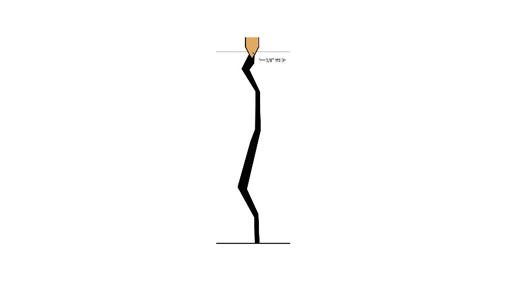
CRACK REPAIR PROCEDURE – Min Width 0.016in

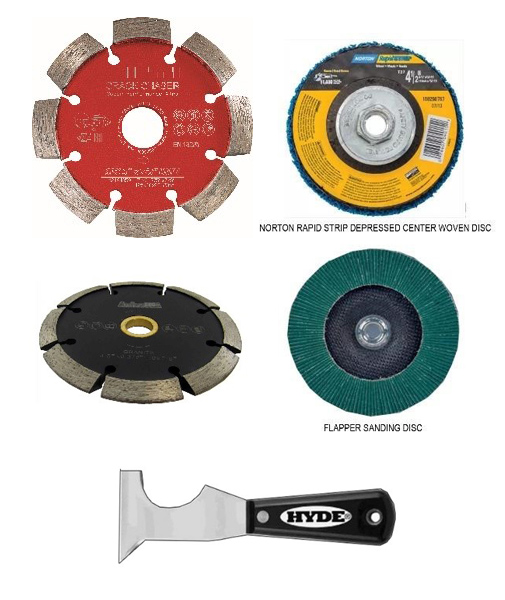
TOOLS
- 4″ Right Angle Grinder.
- Diamond V Blade (3/8” wide).
- Norton Blue Strip Disc (No substitutes).
- 100# Flapper Wheel
- Vacuum with small nozzle.
- Small Compressor with needle tip nozzle.
- Scraper & Razor Knife
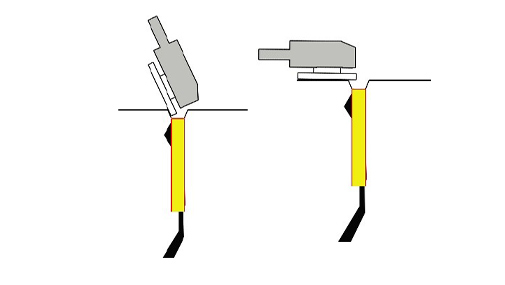
- Hammer Drill with;
- 1/4” X 6” L bit – used to drill pilot holes along the crack.
- 5/16” x 4” L bit – used to re-drill the ¼” holes.

MATERIALS
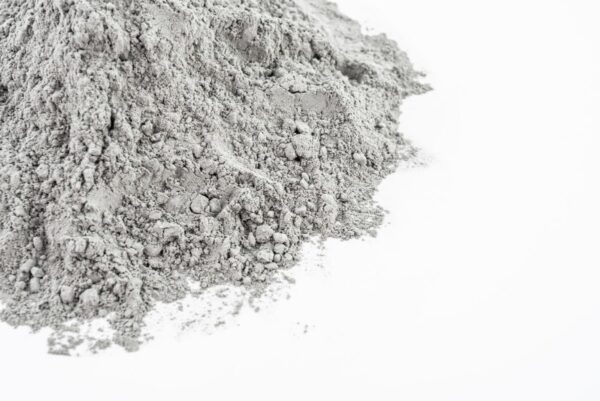
- Rapid Refloor Note: For best color match to existing floors obtain a color sample kit from Metzger & McGuire. Sand the face of the color sample prior to use, the color will lighten from the sanding process.
- Other low viscosity rigid epoxy/urethane.
CRACK REPAIR PROCEDURES
- Chase the crack a maximum of 3/8” wide using the “V” Blade

2. Using a ¼’ diameter bit, drill 5” deep Pilot Holes @ 12” O.C.
-
-
-
-
- The drill bit should not touch the top edges of the “V” or chipping will occur.
-
-
-

3. Using a 5/16” diameter drill bit, Re-Drill all ¼” holes 4” – 5” deep.
- If the drill bit is chipping the edge of the ”V”, slightly widen the “V” to provide additional clearance

4. Using a blade and or small chisel, clean the crack and remove any unsound concrete.
5. Using the 100# flapper wheel lightly sand down the face and edge of the “V” removing exposed fiber and creating a sharp edge (corner).
- Do not round off the corner.
6. Vacuum then blow out the repair.
7. Inject 4 pumps (handle squeezes) of Rapid Refloor into the injection ports (drilled holes).
- Allow the Rapid Refloor to begin to gel in the bottom of the crack approximately 5 – 10 minutes.
- Continue injecting through the ports until the Rapid Refloor is within 1” – 2” inches from the top of the floor.

8. Remove any hardened Rapid Refloor from the face of the “V” using the 80# flapper wheel prior to installing the top layer of Rapid Refloor.
9. Fill completely leaving it slightly high.
12. Sand down the Rapid Refloor using a blue Norton Strip Disc. Note: The Norton Strip Disk will sand down the Rapid Refloor without burning up the edges.
14. Install a light application of the densifier that was used on the existing floor. Back drag using a micro-fiber mop to remove excess.
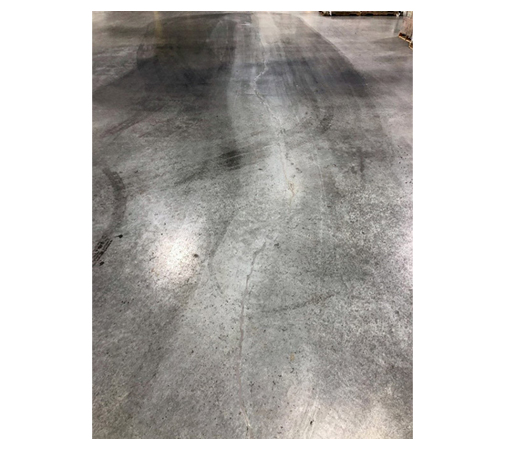
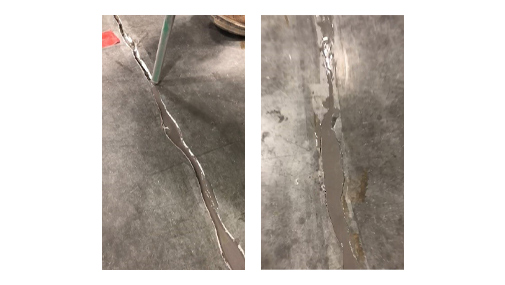
COMPLETED REPAIR